


Super cute and easy recipe for no bake Easy Petit Fours with Nilla Wafers. Fill with your favorite jam, jelly or preserve.
Easy Petit Fours with Nilla Wafers


Ingredients for Easy Petit Fours with Nilla Wafers
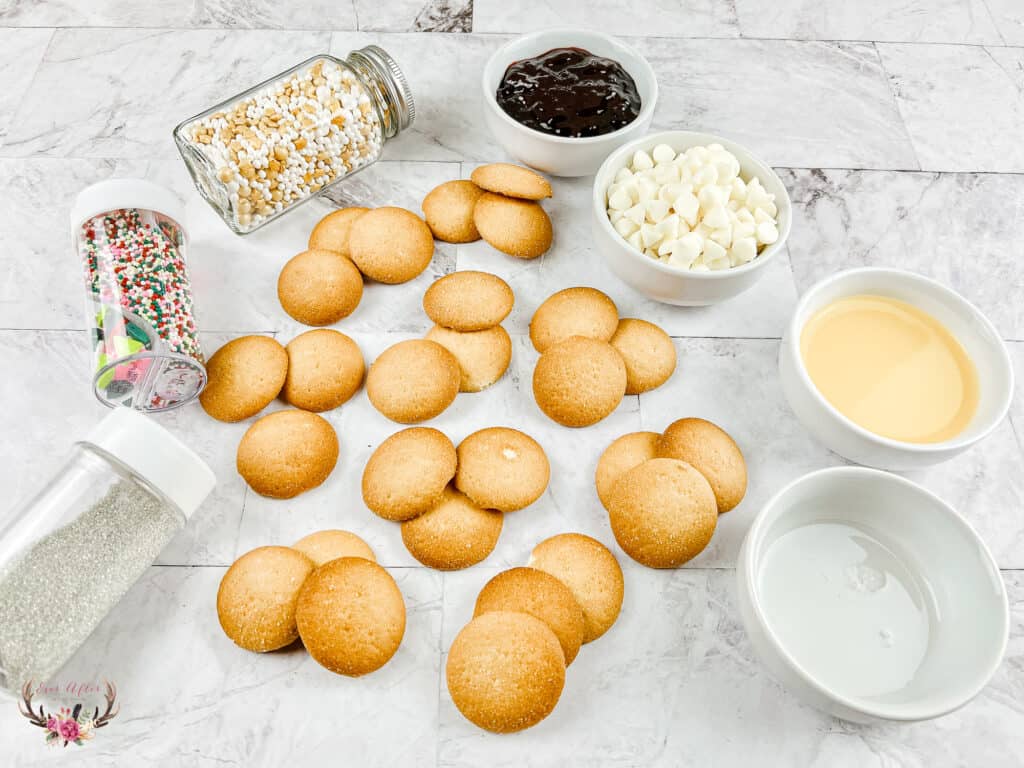
Nilla Wafer cookies, 3 per cake
2-3 tablespoons orange juice
¼ cup raspberry jam
8 oz white chocolate chips
1 teaspoon coconut oil
Instructions for Easy Petit Fours with Nilla Wafers
Place 2 of the 3 cookies needed for each cake flat side up on a wax paper lined tray
Brush the flat sides with orange juice then spread on the jam
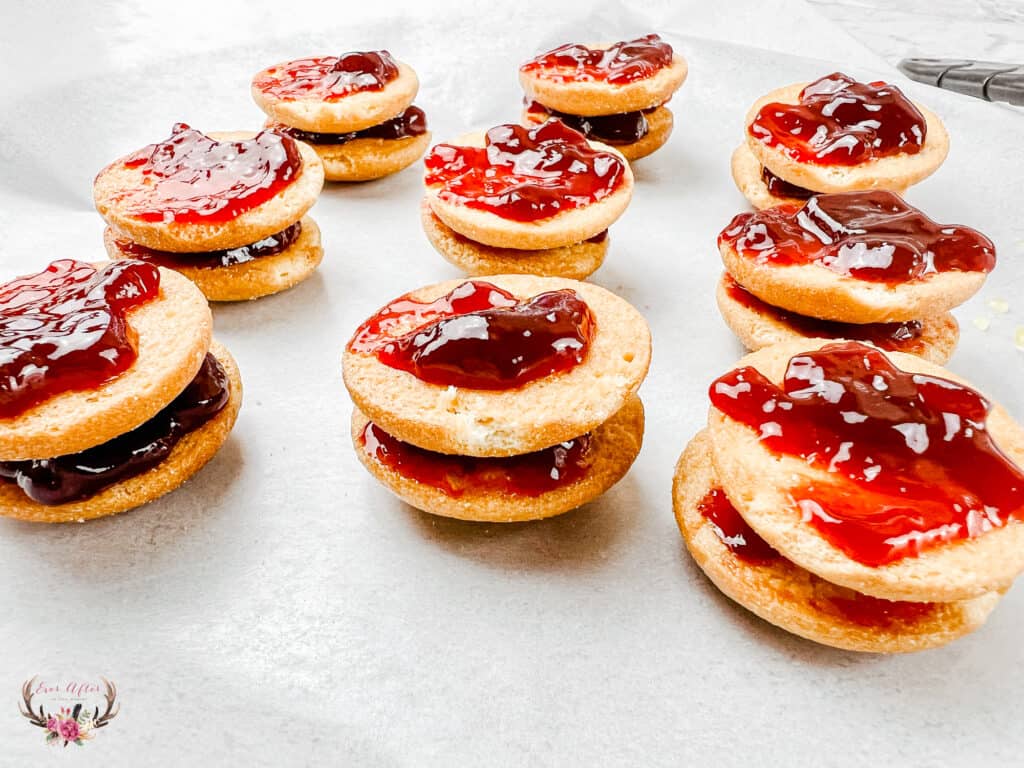
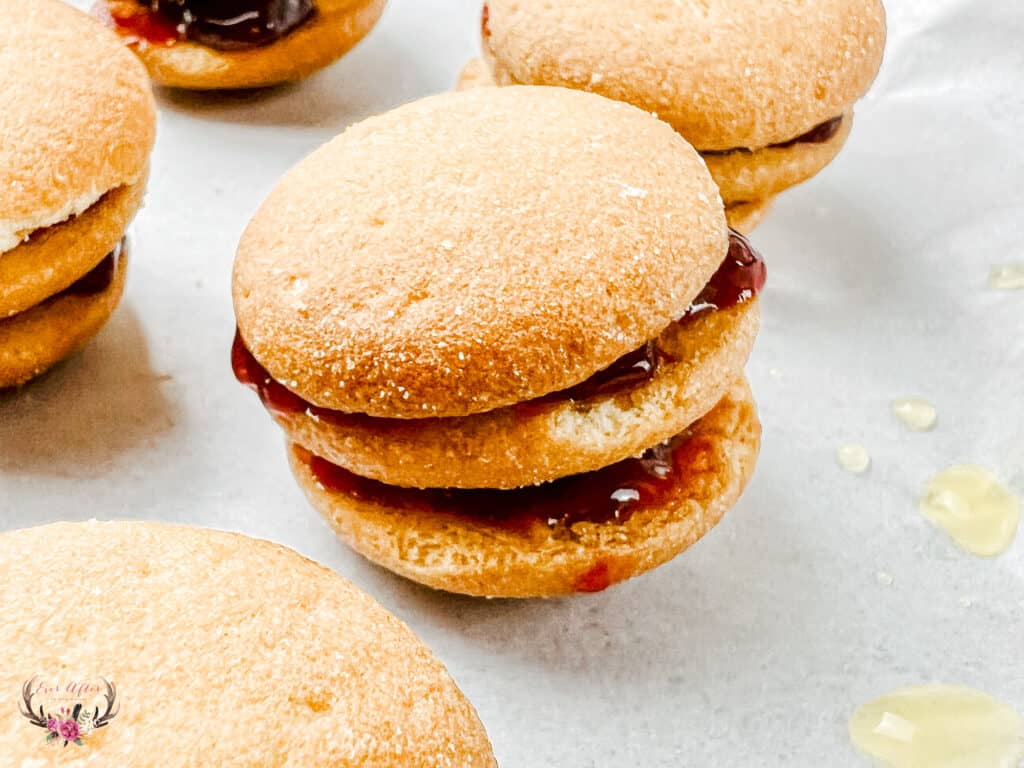
Build the cookies by layering 2 jam topped cookies on top of each other, jam side up
Next top the jam cakes with the 3rd cookie, flat side down
Chill the cookies in the refrigerator overnight
Melt the white chocolate with the coconut oil and stir until smooth
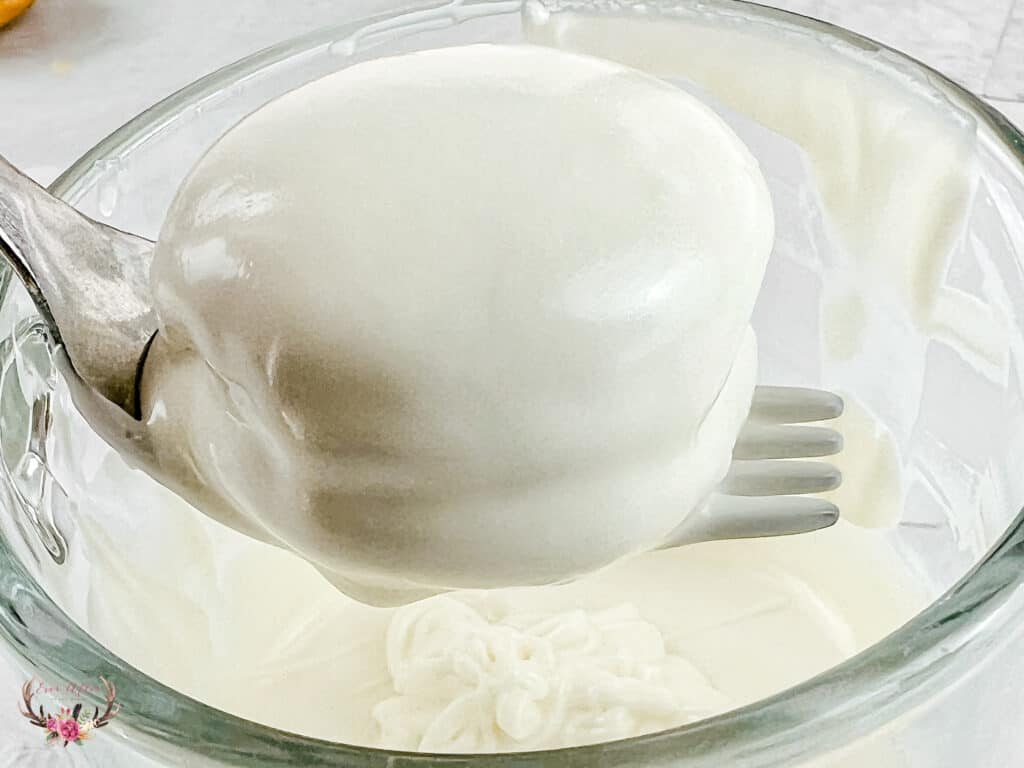
Dip each cake in the melted chocolate, covering completely
Shake off the excess chocolate and place the cake back on the wax paper lined tray
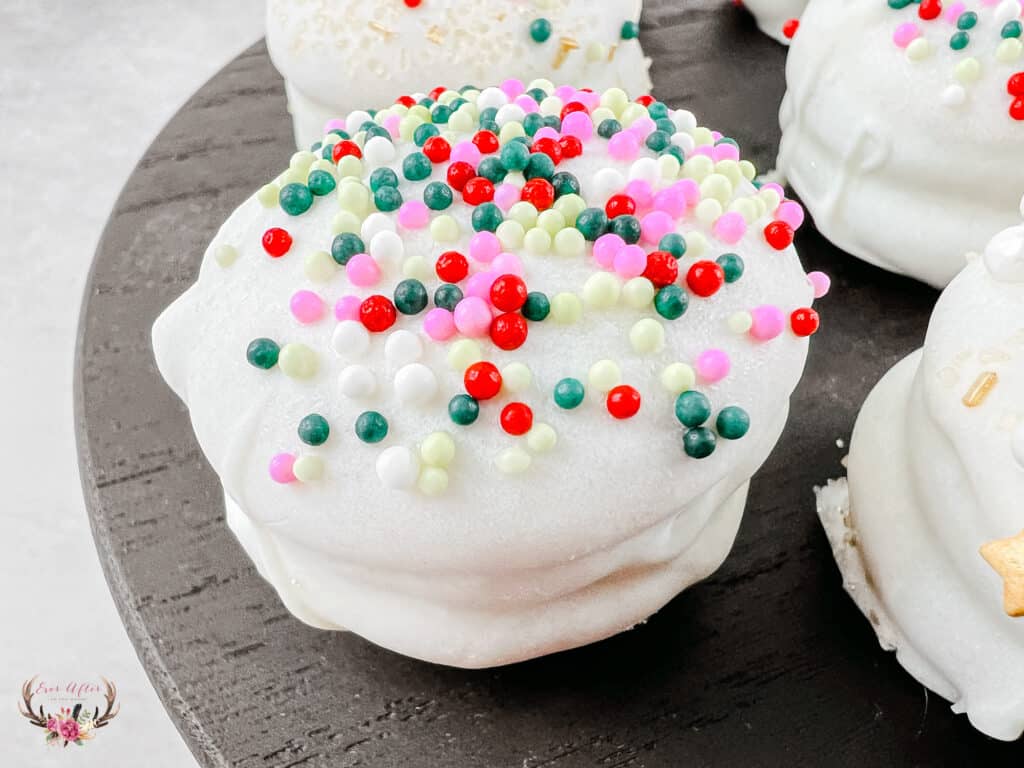
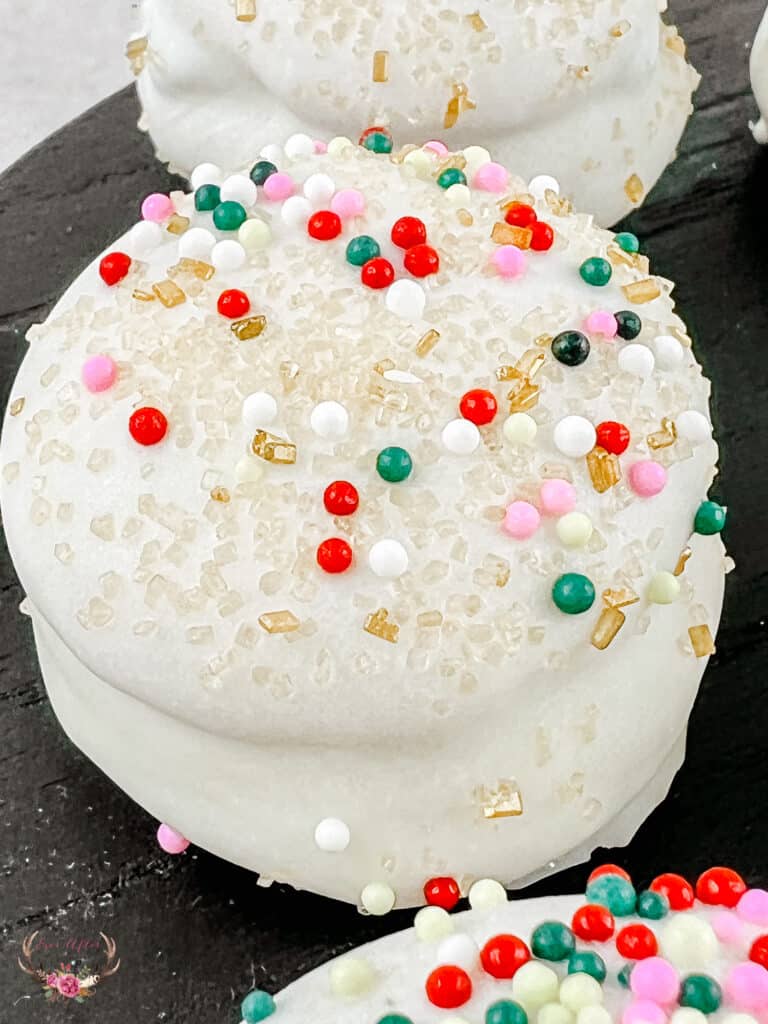
Immediately add sprinkles on each cake after they are dipped
Place the cakes back in the refrigerator until the chocolate sets and you are ready to serve
How to Bake in Batches to Make the Most of Your Baking Time
One way to handle your holiday baking is to bake in batches, then freeze and store for the big day. You can do this successfully over a couple of weeks with batch baking and batch preparing.
The biggest thing to remember is to only try a few different types of things in one day, or focus on just one type of baked good in one day. For example, you might want to bake all your quick breads in one day. Another day you can prepare all your cookie dough. Yet another time, you can bake all your fruit pies and so forth. This process makes the most of the time you have, the space you have, and your skill level.
Be Prepared
Don’t try batch baking without a plan of action. Be sure to write down your plans in advance so that you are sure you have enough time to do everything that you’ve planned. To figure out a basic time line, add up the prep time, the baking time for each oven full, and then multiply that by 1.5 to account for a little extra issues happening. Then you should be sure that you have enough time.
Get Everything Ready to Go
Your kitchen should be spotless when you start, and ensure that you have all the ingredients and appliances necessary to make each item ready to go. If you know, for example, that today you’ll be using about 10 pounds of flour, consider using a large bowl to hold the flour so you can easily spoon the flour into the measuring cup, flatten off over the bowl, without having to get into the bag over and over which usually means spillage.
Clean as You Go
Fill your sink immediately with hot soapy water so you can clean as you go. You will want to wash your mixing dishes and other utensils during the baking process so that you can use them again. There’s no point in totally destroying your kitchen as you batch bake, and you don’t have to. Set out a draining board, fill the sink with hot soapy water, and wash as you go. There are many opportunities during baking to wash a couple of dishes, and this will make the clean-up faster, and the process more organized.


Easy Petit Fours with Nilla Wafers
An easy to make, no-bake petit fours recipe with Nilla Wafers
Ingredients
- Nilla Wafer cookies, 3 per cake
- 2-3 tablespoons orange juice
- ¼ cup raspberry jam
- 8 oz white chocolate chips
- 1 teaspoon coconut oil
Instructions
- Place 2 of the 3 cookies needed for each cake flat side up on a wax paper lined tray
- Brush the flat sides with orange juice then spread on the jam
- Build the cookies by layering 2 jam topped cookies on top of each other, jam side up
- Next top the jam cakes with the 3rd cookie, flat side down
- Chill the cookies in the refrigerator overnight
- Melt the white chocolate with the coconut oil and stir until smooth
- Dip each cake in the melted chocolate, covering completely
- Shake off the excess chocolate and place the cake back on the wax paper lined tray
- Immediately add sprinkles on each cake after they are dipped
- Place the cakes back in the refrigerator until the chocolate sets and you are ready to serve