10 Hot Dog Cooking Fails And 5 You Will Stick To Forever
We’ve all had that moment—hovering over the grill with high hopes and a pack of hot dogs, only to watch them go from promising to burnt in minutes.
I’ve definitely been there, with split franks, soggy buns, and more than a few grill-induced disappointments. But after plenty of trial, error, and taste-testing, I’ve picked up some foolproof tricks that completely changed the way I make hot dogs.
From mastering the perfect char to choosing the right bun and toppings, these simple techniques turned my cookouts from so-so to seriously delicious. Get ready to elevate your hot dog game this summer!
1. Microwave Meltdowns
Nothing screams “kitchen novice” like a hot dog that’s exploded in your microwave! Last Tuesday, I forgot to poke holes in my frank before zapping it, and BOOM – hot dog confetti all over the microwave ceiling.
The mess took forever to clean, and the smell lingered for days. My roommate still brings it up whenever we discuss dinner plans.
Always remember to pierce your hot dogs several times with a fork before microwaving. This simple step allows steam to escape rather than building up inside the casing until it bursts like a meaty firecracker.
2. Grill Cremation Ceremony
Burning hot dogs to a crisp happens to the best of us. I once got distracted by a phone call during a backyard barbecue and returned to find my franks had transformed into charcoal cylinders.
My guests politely nibbled at the blackened remains while reaching for extra condiments to mask the burnt taste. The charred exterior had the consistency of tree bark, while the inside remained mysteriously cold.
Grilling requires constant attention! Set a timer if you’re prone to distractions, and keep those dogs rolling for even cooking. The perfect grilled hot dog should have light grill marks, not look like it survived a house fire.
3. Boiling Until Oblivion
Overboiled hot dogs are sad, sad things. The first time I cooked for my college roommates, I boiled our franks for nearly 20 minutes, thinking longer cooking meant better flavor. Wrong!
The poor things split open, leaked their flavors into the water, and became pale, bloated shadows of their former selves. Everyone was too nice to complain, but the silence at dinner spoke volumes.
Hot dogs only need 4-6 minutes in gently boiling water. Any longer and they’ll lose flavor, texture, and dignity. When the water returns to a boil after adding the dogs, reduce the heat and set your timer – your taste buds will thank you.
4. The Frozen Center Surprise
Biting into a hot dog only to discover a frozen center is like getting coal for Christmas. During my first apartment cookout, I tossed frozen dogs straight onto the grill, assuming they’d cook through. My friend’s face when he hit that icy center still haunts me!
He tried to play it cool (pun intended), but I noticed him discreetly wrapping the remainder in a napkin. The outside looked perfectly cooked while hiding a frigid secret within.
Always thaw frozen hot dogs completely before cooking. If you’re in a hurry, submerge the sealed package in cold water for about 30 minutes, or microwave on the defrost setting before grilling or boiling.
5. Soggy Bun Syndrome
Picture this: perfectly cooked hot dog, premium toppings, and a bun that disintegrates faster than a sandcastle at high tide. My first date picnic became memorable for all the wrong reasons when my carefully prepared hot dogs turned into a lap-full of toppings.
My date was gracious, but spending the afternoon with ketchup-stained khakis wasn’t exactly the impression I’d hoped to make. The soggy bun had collapsed under the weight of my enthusiasm and excessive condiments.
Toast your buns lightly before adding hot dogs and toppings. This creates a moisture barrier and adds delicious texture. Also, pat your hot dogs dry before placing them in buns, and never add hot dogs to buns until you’re ready to eat.
6. Casing Catastrophe
Some hot dogs come with natural casings that need special attention. My neighborhood block party became infamous when I failed to score the casings before grilling, creating hot dog grenades that popped and sent juices flying onto my neighbor’s white shirt.
Mrs. Peterson was surprisingly understanding about her newly tie-dyed blouse, but I noticed she kept her distance from my grill station for the rest of the summer. The casings had contracted and split unpredictably, creating a spectacle worthy of amateur fireworks.
Always make shallow slits in natural casing hot dogs before cooking. This prevents them from bursting while allowing the flavors to develop. A crosshatch pattern works well and even creates more surface area for delicious caramelization.
7. Condiment Avalanche
Enthusiasm for toppings once led me to create what my friends now call “The Incident.” Eager to impress at a summer cookout, I piled my hot dog with every available condiment, creating an unstable tower of deliciousness.
One bite sent ketchup, mustard, relish, onions, and sauerkraut cascading down my shirt and onto my new deck furniture. The hot dog itself was lost somewhere in the colorful landslide, its existence merely theoretical.
Practice restraint with condiments and build strategically. Start with sauces on the inside of the bun, then add the hot dog, followed by toppings in order of weight. Some toppings might be better served on the side, allowing guests to add them as they eat.
8. The Shriveled Disappointment
Hot dogs can shrivel up like my hopes and dreams when cooked at too high a temperature. My attempt to speed up cooking by cranking the heat resulted in sad, wrinkled franks that looked like they’d aged decades in minutes.
My nephew pointed at them and asked if they were “old man fingers,” which pretty much summed up their appearance. They had contracted to half their original size while developing a tough, leathery exterior that challenged even the strongest jaws.
Cook hot dogs at medium heat rather than high. This allows them to heat through evenly without excessive shrinkage or toughening. Patience yields plump, juicy hot dogs that maintain their shape and tenderness – worth the extra few minutes!
9. Raw Deal Disaster
Serving undercooked hot dogs is a rookie mistake I’ve made exactly once. During a camping trip, I was so eager to feed my hungry friends that I pulled the dogs off the campfire too soon, mistaking their color change for doneness.
My buddy Jake took one bite and gave me a look that said everything. The center was barely warm, with a concerning pink hue that screamed “food poisoning potential.” We ended up roasting marshmallows for dinner instead.
Hot dogs should reach an internal temperature of 165°F (74°C). When in doubt, cut one open to check. Properly cooked hot dogs should be steaming hot throughout and firm to the touch, not squishy or cool in the center.
10. Spiral Cut Catastrophe
The spiral cut hot dog trend looked amazing online. My attempt, however, resulted in what can only be described as hot dog accordions. I tried to impress my in-laws with this fancy technique, but my knife skills weren’t up to the challenge.
Some parts were cut too deep, causing sections to fall off during cooking. Others weren’t cut enough, creating an irregular cooking pattern. My father-in-law charitably called them “artistic” while discretely reaching for a hamburger instead.
If attempting spiral cuts, use a skewer through the center to stabilize the hot dog and make shallow, even cuts at a slight angle. Practice on a few before your main event. When done correctly, spiral cuts create more crispy edges while helping the hot dog cook evenly.
11. Spiral Cut Magic
My hot dog game changed forever when I mastered the spiral cut technique. Threading a skewer through the center for stability, I carefully cut a shallow spiral pattern around each frank before grilling.
The results were mind-blowing! The spirals created extra surface area that caramelized beautifully while creating perfect pockets for catching condiments. Every bite delivered the perfect balance of snap, juiciness, and toppings.
The spiral cut also prevents hot dogs from rolling on the grill and ensures even cooking throughout. My friends now request “those fancy hot dogs” at every cookout, and I’m happy to oblige. It takes just a minute more but transforms an ordinary hot dog into gourmet street food.
12. Butter-Toasted Bun Revolution
Spreading a thin layer of butter on hot dog buns before toasting them on the grill transformed my hot dog experience forever. I discovered this technique by accident when preparing lobster rolls and had some butter remaining.
The buttered buns developed a golden, crispy exterior while remaining soft inside. The subtle richness complemented the savory hot dog perfectly, adding a depth of flavor I never knew was missing.
Just spread a thin layer of softened butter on the inside of each bun, then place butter-side down on the grill for 30 seconds until golden. This creates a moisture barrier that prevents sogginess while adding incredible flavor. My family now refuses to eat hot dogs any other way!
13. Beer Bath Brilliance
Simmering hot dogs in beer instead of water was a game-changing discovery I made during a cookout when we ran out of propane. I had to improvise with stovetop cooking and grabbed a beer from the cooler on a whim.
The beer infused the hot dogs with amazing flavor – slightly malty, complex, and utterly delicious. Even my culinary snob friend couldn’t stop raving about them, demanding to know my “secret ingredient.”
Pour a can or bottle of beer into a pan, add a tablespoon of butter and a dash of onion powder, then simmer hot dogs for 5-7 minutes. Finish them on the grill for a minute per side to get those perfect grill marks. The depth of flavor will make people think you’re a hot dog wizard!
14. Bacon-Wrapped Revelation
Wrapping hot dogs in bacon before grilling them changed everything I thought I knew about backyard cuisine. My brother-in-law showed me this technique during a family reunion, and I’ve never looked back.
The bacon crisps up while basting the hot dog with its flavorful fat, creating a smoky, savory flavor bomb that’s utterly irresistible. The contrast between the crispy bacon exterior and juicy hot dog interior creates a textural masterpiece.
Secure thin bacon slices around hot dogs with toothpicks before grilling over medium heat, turning frequently until the bacon is crisp. Remove toothpicks before serving. Pro tip: a light brush of maple syrup on the bacon adds a sweet-savory element that’s absolutely magnificent with spicy mustard!
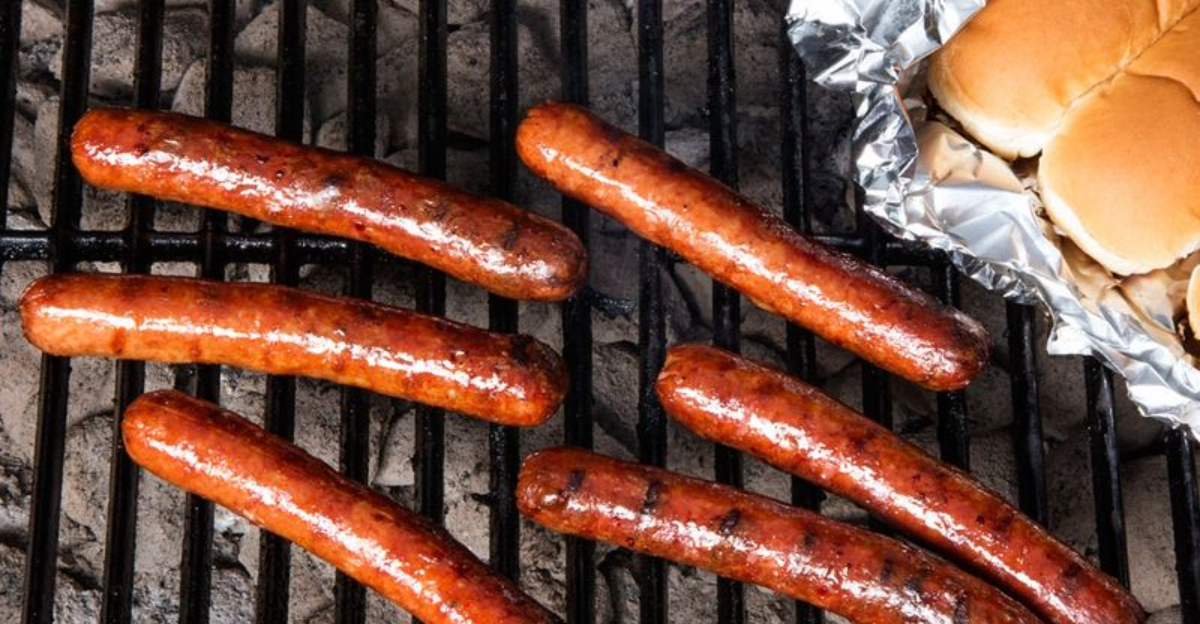
15. Crosshatch Grill Marks Technique
Mastering the art of perfect crosshatch grill marks elevated my hot dog game from amateur to pro status. My neighbor, a former restaurant chef, taught me this simple technique that makes hot dogs look as good as they taste.
The secret is patience and proper grill temperature. Start with a clean, well-oiled grill heated to medium-high. Place hot dogs perpendicular to the grates and don’t touch them for 2 minutes.
Rotate each hot dog 90 degrees and cook for another 2 minutes to create the crosshatch pattern. Flip and repeat on the other side. Not only does this technique create Instagram-worthy hot dogs, but it also ensures even cooking and maximizes those delicious caramelized flavors that make grilled hot dogs so irresistible.