15 Years as a Chef Taught Me These 10 Tips for Making Incredible Grilled Chicken
Grilled chicken sounds simple until you’ve actually tried to make it taste amazing. Too dry, too bland, too charred — the struggle is real.
But after 15 years in the kitchen, with more chickens than I can count hitting the grill, I’ve picked up a few secrets that turn ho-hum into mouthwatering magic.
Whether you’re cooking for a crowd or just yourself, these tricks come from real experience, a few trial-by-fire moments, and more than one smoke alarm going off.
1. Marinate for Magic Flavors
Patience transforms ordinary chicken into something extraordinary. A good marinade needs at least 4 hours to work its magic, though overnight delivers the best results.
The acid in marinades (like lemon juice or vinegar) tenderizes the meat while oils carry flavors deep inside.
My secret weapon? Adding a tablespoon of honey to any marinade – it helps create that beautiful caramelization everyone loves.
2. Bone-in, Skin-on for Juicier Results
Boneless, skinless chicken might seem convenient, but you’re sacrificing flavor and moisture. The bones act like little heat conductors, cooking the meat evenly from within.
Meanwhile, that skin creates a natural barrier that locks in juices. Fat renders slowly during cooking, basting the meat naturally.
When done right, you’ll get crispy skin outside and tender, flavorful meat inside – the perfect chicken experience!
3. Preheat Your Grill Properly
Rushing to throw chicken on a lukewarm grill is a rookie mistake I made constantly. A properly preheated grill (10-15 minutes minimum) is non-negotiable for restaurant-quality results.
Gas grills should reach 450°F before cooking. For charcoal, wait until coals turn ashy white.
The intense initial heat sears the outside immediately, creating a flavor-sealing crust while marking those beautiful grill lines everyone loves to photograph.
4. Oil Those Grates to Prevent Sticking
Nothing ruins grilled chicken faster than having half the meat stuck to your grill! Before cooking, fold a paper towel, dip it in high-heat oil (like canola), and use tongs to rub it across the grates.
This simple step creates a non-stick surface that prevents tearing.
Plus, oiled grates make those gorgeous crosshatch grill marks that make your chicken look professional. Just remember – oil the grates, not the chicken itself.
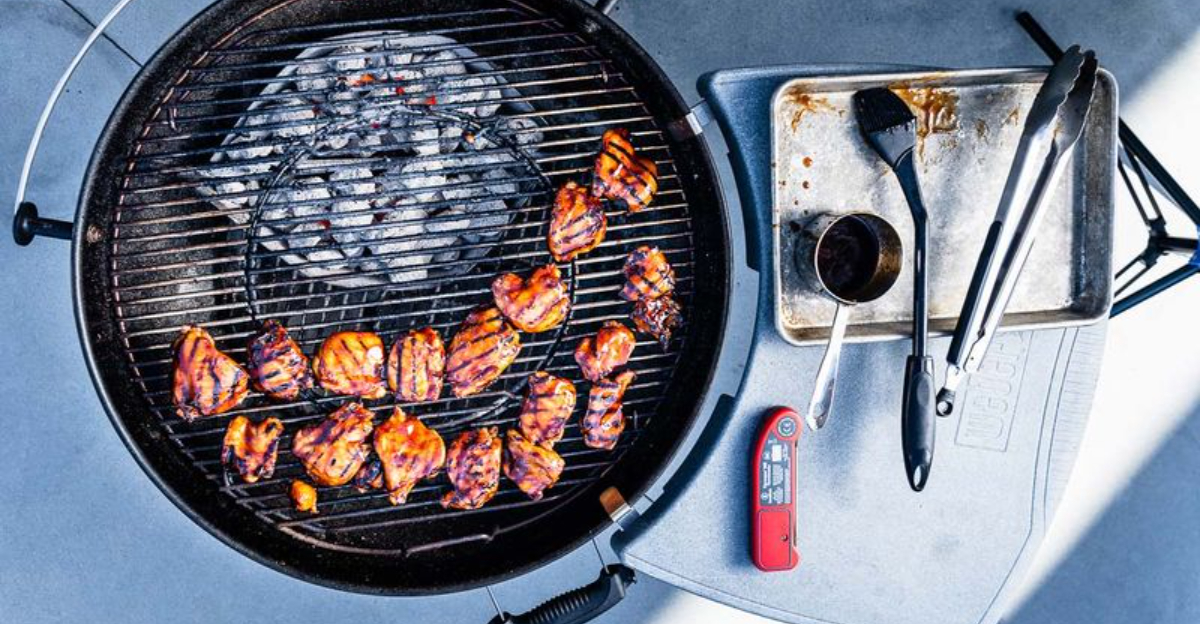
5. Give Your Chicken Some Space
Cramming too many pieces together is tempting when you’re hungry or feeding a crowd. Resist this urge! Overcrowding creates steam instead of sear, resulting in pale, rubbery chicken.
Each piece needs at least an inch of space around it. Air circulation is crucial for even cooking and developing that gorgeous caramelized exterior.
I’d rather grill in batches than sacrifice quality – trust me, your patience will be rewarded with dramatically better results.
6. Master the Two-Zone Fire Technique
Professional chefs rarely cook chicken over direct heat the entire time. We create two zones: a hot side for searing and a cooler side for gentle cooking.
For gas grills, turn one burner to high and another to low. With charcoal, push coals to one side.
Start chicken on the hot zone for grill marks, then move to the cooler side to finish cooking without burning. This technique gives you total control, especially with thicker pieces.
7. Keep the Lid Down During Cooking
Constantly peeking might be tempting, but every time you lift that lid, you’re letting precious heat escape! A closed lid creates an oven-like environment that cooks chicken evenly.
The trapped heat circulates around the meat, ensuring doneness without drying. My rule: open only when flipping or checking temperature.
Your chicken will cook faster, more evenly, and retain more moisture. Plus, your grill will maintain consistent temperature throughout the cooking process.
8. Flip Just Once for Perfect Grill Marks
Anxious grillers flip chicken constantly, but this prevents proper caramelization and those coveted grill marks. Patience is key here!
Wait until the meat naturally releases from the grate – if it sticks, it’s not ready. For most chicken pieces, this means about 5-7 minutes per side.
When you do flip, use tongs (never a fork!) to avoid puncturing the meat and losing precious juices. One perfect flip is all you need.
9. Rest Before Slicing for Juicier Bites
Cutting into chicken straight from the grill is tempting but disastrous! The juices haven’t had time to redistribute, so they’ll flow right out onto your plate instead of staying in the meat.
Tent chicken loosely with foil and rest for 5-10 minutes before serving. During this time, the internal temperature actually continues rising slightly, completing the cooking process.
The difference in juiciness between rested and unrested chicken is dramatic – don’t skip this crucial step!
10. Temperature Trumps Timing Every Time
Stop guessing if your chicken is done! A quality meat thermometer is the most important tool in my grilling arsenal. The USDA recommends 165°F for chicken, but there’s a pro secret here.
Pull chicken off at 160°F – carryover cooking during resting will bring it to 165°F naturally. Breast meat can dry out quickly, so timing is crucial.
Dark meat can go higher (175°F) for better texture. No more dry chicken or undercooked scares – just perfectly cooked meat every time.