14 Common Canned Biscuit Mistakes Everyone Falls For
Canned biscuits are a gift to home cooks everywhere, but even the simplest shortcuts can trip us up.
Maybe you’ve flattened them too much, baked them too close together, or forgot the butter brush that makes all the difference. Sound familiar? You’re not alone.
These doughy darlings can be surprisingly fussy if you don’t know the tricks. If you’ve ever wondered why your biscuits aren’t bakery-level, the answer might be hiding in your habits.
1. Baking from Frozen
Grabbed those biscuits straight from the freezer? Big mistake! Frozen dough doesn’t rise properly, leaving you with dense hockey pucks instead of fluffy delights.
The cold temperature prevents the leavening agents from activating correctly. For best results, let that tube come to room temperature for about 30 minutes before baking.
2. Skipping Oven Preheat
Patience pays off when it comes to biscuit baking! Tossing your dough circles into a cold oven sabotages their rise potential from the start.
Without that initial blast of heat, the butter melts too slowly and the steam doesn’t form properly.
Always give your oven a full 15-20 minutes to reach temperature before those biscuits go in.
3. Using a Cold Baking Sheet
Metal conducts temperature like nobody’s business! Placing your precious dough on an ice-cold sheet creates uneven baking and poor rise on the bottoms.
The temperature shock messes with the delicate chemical reactions happening in your dough.
Try warming your baking sheet in the oven for a few minutes while it preheats for more consistent results.
4. Crowding Biscuits on the Pan
Biscuits need personal space just like the rest of us! Cramming them together on the pan might seem efficient, but it’s actually sabotaging your breakfast.
Without proper airflow, the sides stay doughy while the tops brown. Give each biscuit at least an inch of breathing room so hot air can circulate and create that perfect golden crust all around.
5. Tearing Dough When Separating
Manhandling those perforated edges is a surefire way to deflate your dough’s potential! Rough handling damages the carefully engineered air pockets inside.
The secret is gentle separation along the perforations. Try using a butter knife to carefully separate each biscuit instead of pulling them apart with your fingers.
Your tender touch will be rewarded with higher, fluffier results.
6. Ignoring the Can’s Bake Time
Those instructions on the label aren’t just suggestions! Each brand formulates their dough differently, requiring specific bake times for optimal results.
Winging it based on how they look can lead to deceptively golden exteriors with raw middles.
Set a timer according to the package directions, then check with a toothpick if you’re unsure about doneness.
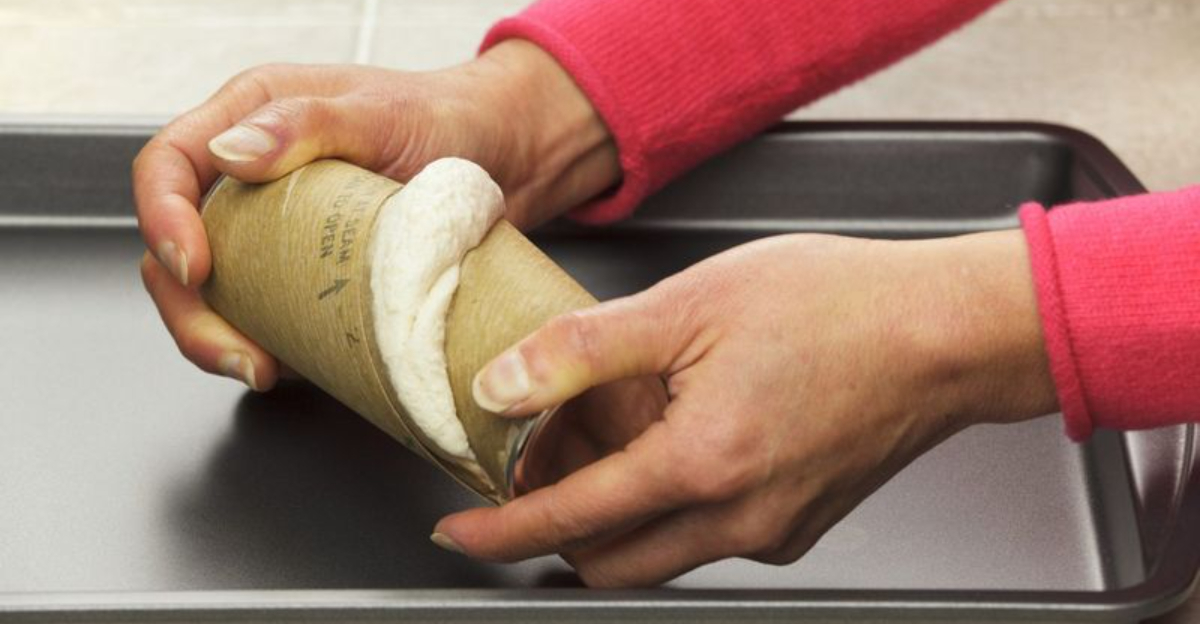
7. Failing to Vent the Can Properly
BANG! That startling pop when opening a biscuit can isn’t just for laughs. It’s physics at work! Improper opening techniques can damage your dough before it even hits the pan.
Whacking the can against the counter edge crushes delicate air bubbles.
Instead, peel back the label, find the spiral seam, and press gently with a spoon until it opens with a controlled pop.
8. Baking Directly on Foil
Aluminum foil might save cleanup time, but it’s secretly ruining your biscuit bottoms! The reflective surface intensifies bottom heat, often causing burning before the tops are done.
The metal also prevents proper moisture release. Parchment paper makes a much better non-stick surface that allows even browning without scorching those delicate bottoms.
9. Not Rotating the Pan Mid-Bake
Most home ovens have hot spots that can turn half your batch golden while leaving the rest pale and underdone. The back corners typically run hotter than the front.
A simple 180-degree rotation halfway through baking ensures even browning across all your biscuits. This small step takes just seconds but makes a huge difference in your final results.
10. Overbaking Until Dry
Golden-brown doesn’t mean keep cooking! Many folks leave biscuits in too long, chasing that perfect color while moisture escapes.
The residual heat continues cooking biscuits even after removal from the oven.
Pull them out when the tops are light golden and they’ll finish cooking to perfection while cooling. Your mouth will thank you for those extra moisture-rich bites!
11. Underbaking with Doughy Centers
Impatience leads to gummy middles! Pulling biscuits too soon leaves that raw dough taste nobody wants. The true test is a gentle tap on the top. It should sound hollow, not soft.
If you’re unsure, use a toothpick in the center biscuit where batches cook slowest. Clean toothpick means you’re good to go!
12. Forgetting to Grease the Sheet
Nothing ruins breakfast faster than biscuits that need to be chiseled off the pan! Even non-stick sheets benefit from a light coating of cooking spray or butter.
The high sugar content in many canned biscuits makes them particularly prone to sticking.
A quick spritz before arranging your dough means your biscuits will slide right off when done, keeping those perfect bottoms intact.
13. Reusing a Hot Pan for New Batches
Marathon baking sessions require some cooling down! Slapping fresh dough onto a scorching hot pan starts cooking the bottoms before they even hit the oven.
This head start means uneven baking and potentially burnt bottoms with underdone tops.
Either rotate between two pans or run your hot pan under cool water (dry thoroughly!) before loading up the next batch.
14. Cutting Biscuits Apart with a Dull Knife
Sometimes you want smaller biscuits, but attacking them with a butter knife creates more problems than solutions! Dull blades compress and seal the edges, preventing proper rising.
For clean cuts that preserve those air pockets, use a sharp knife or metal bench scraper.
Quick, decisive cuts work best – no sawing motion! This maintains the internal structure for maximum fluffiness.