10 Essential Tips To Get Your Grilled Ribs Perfect Every Time
Grilled ribs are the ultimate test of backyard BBQ skills, with the perfect balance of smoky flavor, tender meat, and that irresistible caramelized crust.
But getting them just right can feel tricky, even for seasoned grillers. Luckily, a few essential tips can turn your rib game from good to unforgettable.
Whether you’re firing up the grill for the first time or looking to impress your crew, these tricks will help you nail juicy, fall-off-the-bone ribs every time.
1. Low and Slow Temperature Control
Cranking up the heat might seem like a shortcut, but patience pays off with ribs. Keep your grill between 225-250°F for that magical transformation of tough meat into tender goodness.
Think of your grill as a slow cooker with smoke. This gentle heat allows collagen to break down properly while fat renders slowly, creating that melt-in-your-mouth texture barbecue legends are made from.
2. Peel Away the Membrane
Flip those ribs over and you’ll spot a shiny, silvery sheet on the bone side. That’s the membrane, which is your flavor barrier!
Slide a butter knife under one corner, grab it with a paper towel, and pull it clean off.
Without this step, your seasonings can’t penetrate properly, and you’ll end up with chewy spots nobody wants. The difference is night and day.
3. Rub Before You Roll
Your dry rub needs time to work its magic! Apply generously at least an hour before cooking. Overnight is even better if you can plan ahead.
The salt in your rub starts a mini-curing process, drawing flavors deep into the meat.
My secret weapon? Brown sugar in the rub creates that incredible caramelized bark while balancing the savory spices.
4. Master Indirect Heat Cooking
Direct flames are rib destroyers! Set up your grill with coals or active burners on one side only, placing ribs on the opposite side.
This two-zone setup creates a gentle convection environment where smoke and heat circulate without burning.
For gas grills, light just the left or right burners. For charcoal, push those glowing coals to one side and let indirect magic happen.
5. Wrap for Tenderness
After about 3 hours of smoking, your ribs hit the stall, where they stop getting tender. Time for the Texas Crutch!
Wrap them tightly in foil or butcher paper with a splash of liquid (apple juice works wonders).
This mini-sauna environment powers through the stall, softening tough connective tissues. Unwrap for the final hour to firm up that beautiful bark.
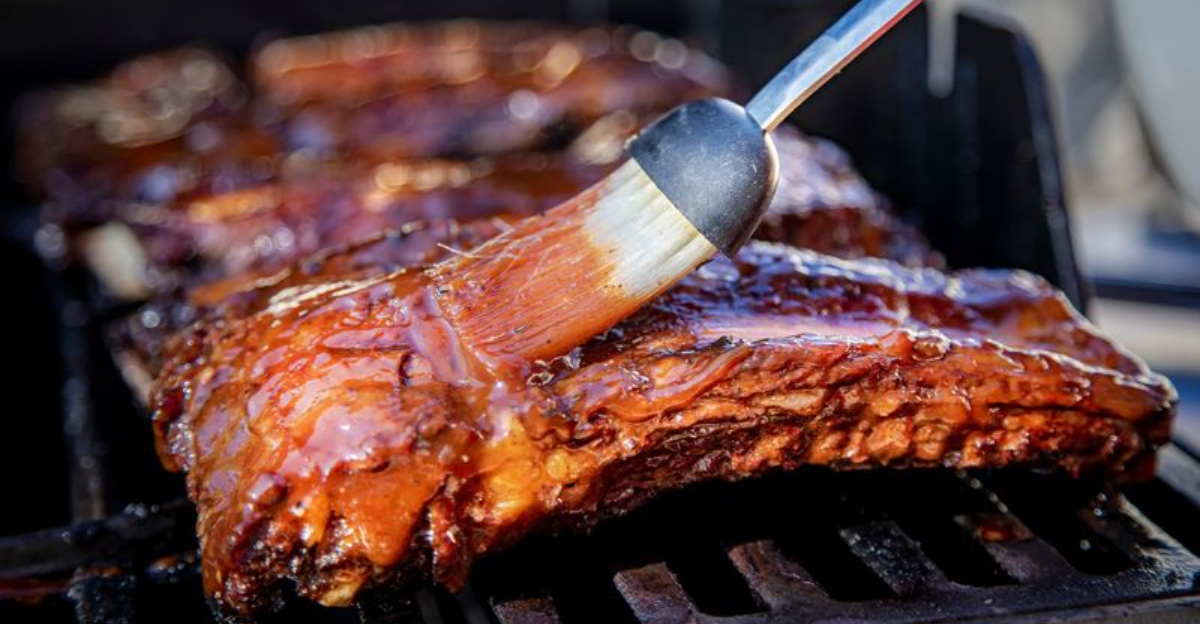
6. Sauce Timing Is Everything
Hold that sauce bottle! Applying barbecue sauce too early guarantees a burnt, bitter disappointment.
Sugar burns at around 265°F, so wait until the final 10-15 minutes of cooking before brushing on your sauce.
Apply in thin layers, allowing each to set slightly before adding more. This creates that sticky, shiny glaze without the dreaded char of burnt sugar.
7. Monitor Grill Temperature Religiously
Temperature swings are the silent rib-ruiners! Your built-in grill thermometer is probably lying to you by 25-50 degrees.
Invest in a good digital thermometer with dual probes. One is for the grill environment, one for the meat.
Adjust your vents frequently to maintain that sweet spot between 225-250°F. Consistency creates that competition-worthy texture that separates good ribs from legendary ones.
8. Add a Water Pan for Moisture
Dry ribs are sad ribs! Place a disposable aluminum pan filled with water directly under your meat or on the hot side of your grill.
This simple addition creates a humid cooking environment that prevents moisture loss while stabilizing temperatures.
The water absorbs and regulates heat fluctuations, acting as a thermal buffer. As a bonus, you can catch drippings in it for amazing gravy later!
9. Give Ribs a Rest Period
Rushing to slice your ribs straight off the grill is tempting but costly! Let them rest 10-15 minutes under loose foil.
During this resting period, the meat’s internal juices redistribute evenly instead of spilling out onto your cutting board.
The proteins also relax, making for a more tender bite. Your patience here means juicier, more flavorful ribs, worth every minute of waiting.
10. Slice Between the Bones
Flip those beautiful ribs bone-side up for slicing perfection. You’ll clearly see where each bone ends and begins.
Use a sharp knife to cut precisely between bones rather than through them. This technique showcases your handiwork while giving each rib its perfect portion of meat.
For baby backs, a single bone per serving works well, while St. Louis cuts might need two bones per portion.